
Fox Hunt Logger is a tool for logging listening points in an Amateur Radio Fox Hunt. Rather than recording your data manually, Fox Hunt Logger captures your GPS location automatically and records date/time, signal strength, bearing, radio and antenna settings, and attenuation — then plots everything on an interactive Google Map so you can visualize your hunt trail in real time. Data can later be downloaded and analyzed – limited only by your imagination.
Who can access
Users must create an account on this system and register their Name, Email address, and Callsign to use the Fox Hunt Logger. Registration is limited to licensed Amateur Radio Operators and at the discretion of the system administrator. Users must be logged-in to the system to access the features of the Fox Hunt Logger and Log. Send a note via the Contact Us page requesting access and we’ll provide the registration info.
When you have successfully entered your user credentials via the Login menu link, you will be returned to the Home page and the “Fox Hunt Logger” link will appear on the Fox Hunting menu at the top of the page. Use that link to open the Fox Hunt Logger page.
Before creating any log entry or accessing any log data, you must first log into the system with your user credentials. Use the Login link on the main menu. If you’ve forgotten your password, use the “Lost your password?” link on the login page to reset your password.
IMPORTANT: Be sure to check the “Remember Me” box when logging in to the system. This will help ensure your login credentials are retained throughout the hunting session.
Add a new location record
Fox Hunt Logger is designed to be used on a smartphone or tablet in the field. Use Chrome (recommended) and make sure location services are enabled for the browser — the form captures your GPS coordinates automatically when it loads.
Complete the following fields
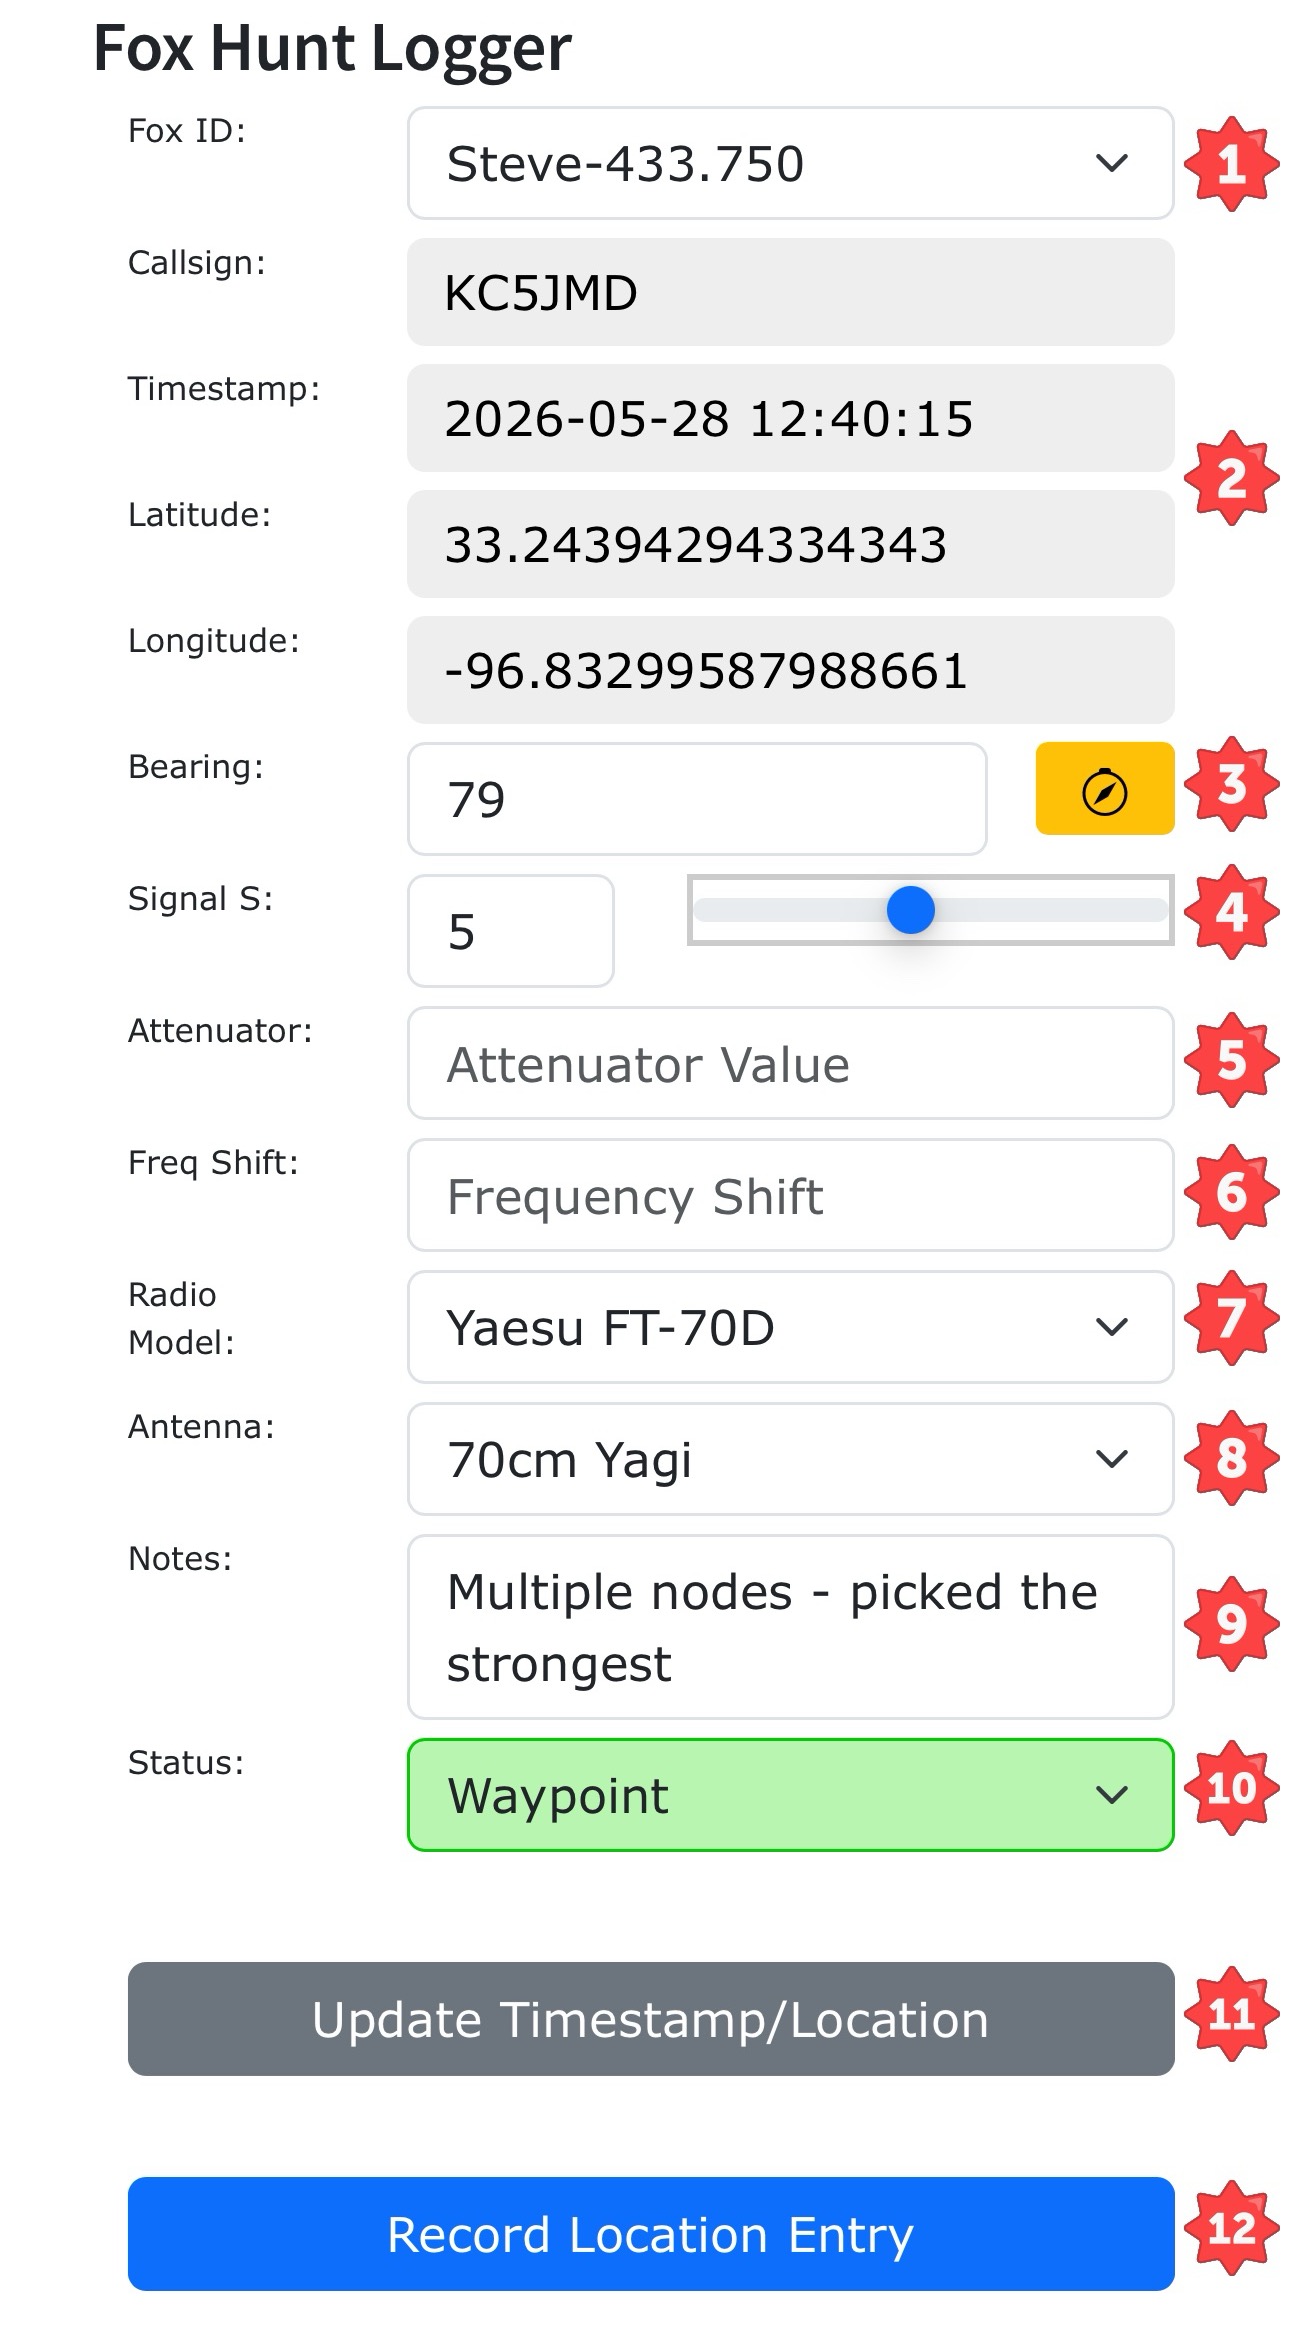
Field Descriptions
| 1 | Select the Fox you’re hunting from the choice list. |
| 2 | These fields are automatically filled by the system. If your Callsign is not indicated, you must log in. See note above. |
| 3 | Enter the compass bearing for the strongest signal from your location. Press the button to enter the bearing from the phone’s compass. |
| 4 | Enter the S-meter signal strength. You may use the slider to select. |
| 5 | If using an attenuator, enter the attenuator value. |
| 6 | If using an offset attenuator, enter the frequency offset. |
| 7 | Select your radio model. If not listed, add it to the Notes (9) and we’ll add it to the list for future logs. |
| 8 | Select your antenna type. If not listed, add it to the Notes (9) and we’ll add it to the list for future logs. |
| 9 | Enter your Notes for this log entry. |
| 10 | Select the Status type for this log entry (Start, Waypoint, Found Fox) |
| 11 | Press this button to update the timestamp and GPS coordinates. |
| 12 | Press this button to submit your log entry. |
Submit the record
Enter the data described above, then press the <blue> “Record Location Entry” button to save the record to the database. On submission the Map at the bottom of the page will be updated with a new location marker.
Add the next location
To enter the next location point, simply press the <grey> Update Timestamp/Location to update the fields to your new location and update the Bearing, Signal Strength, and other values as-appropriate for this new location. Press the <blue> button to submit the new record.
NOTE: Be *sure* that you have selected the correct FoxID each time you submit a record. If you’re hunting multiple Foxes, you can submit a record for each by changing the FoxID selection and recording the new location.
Visualizing your “hunt”
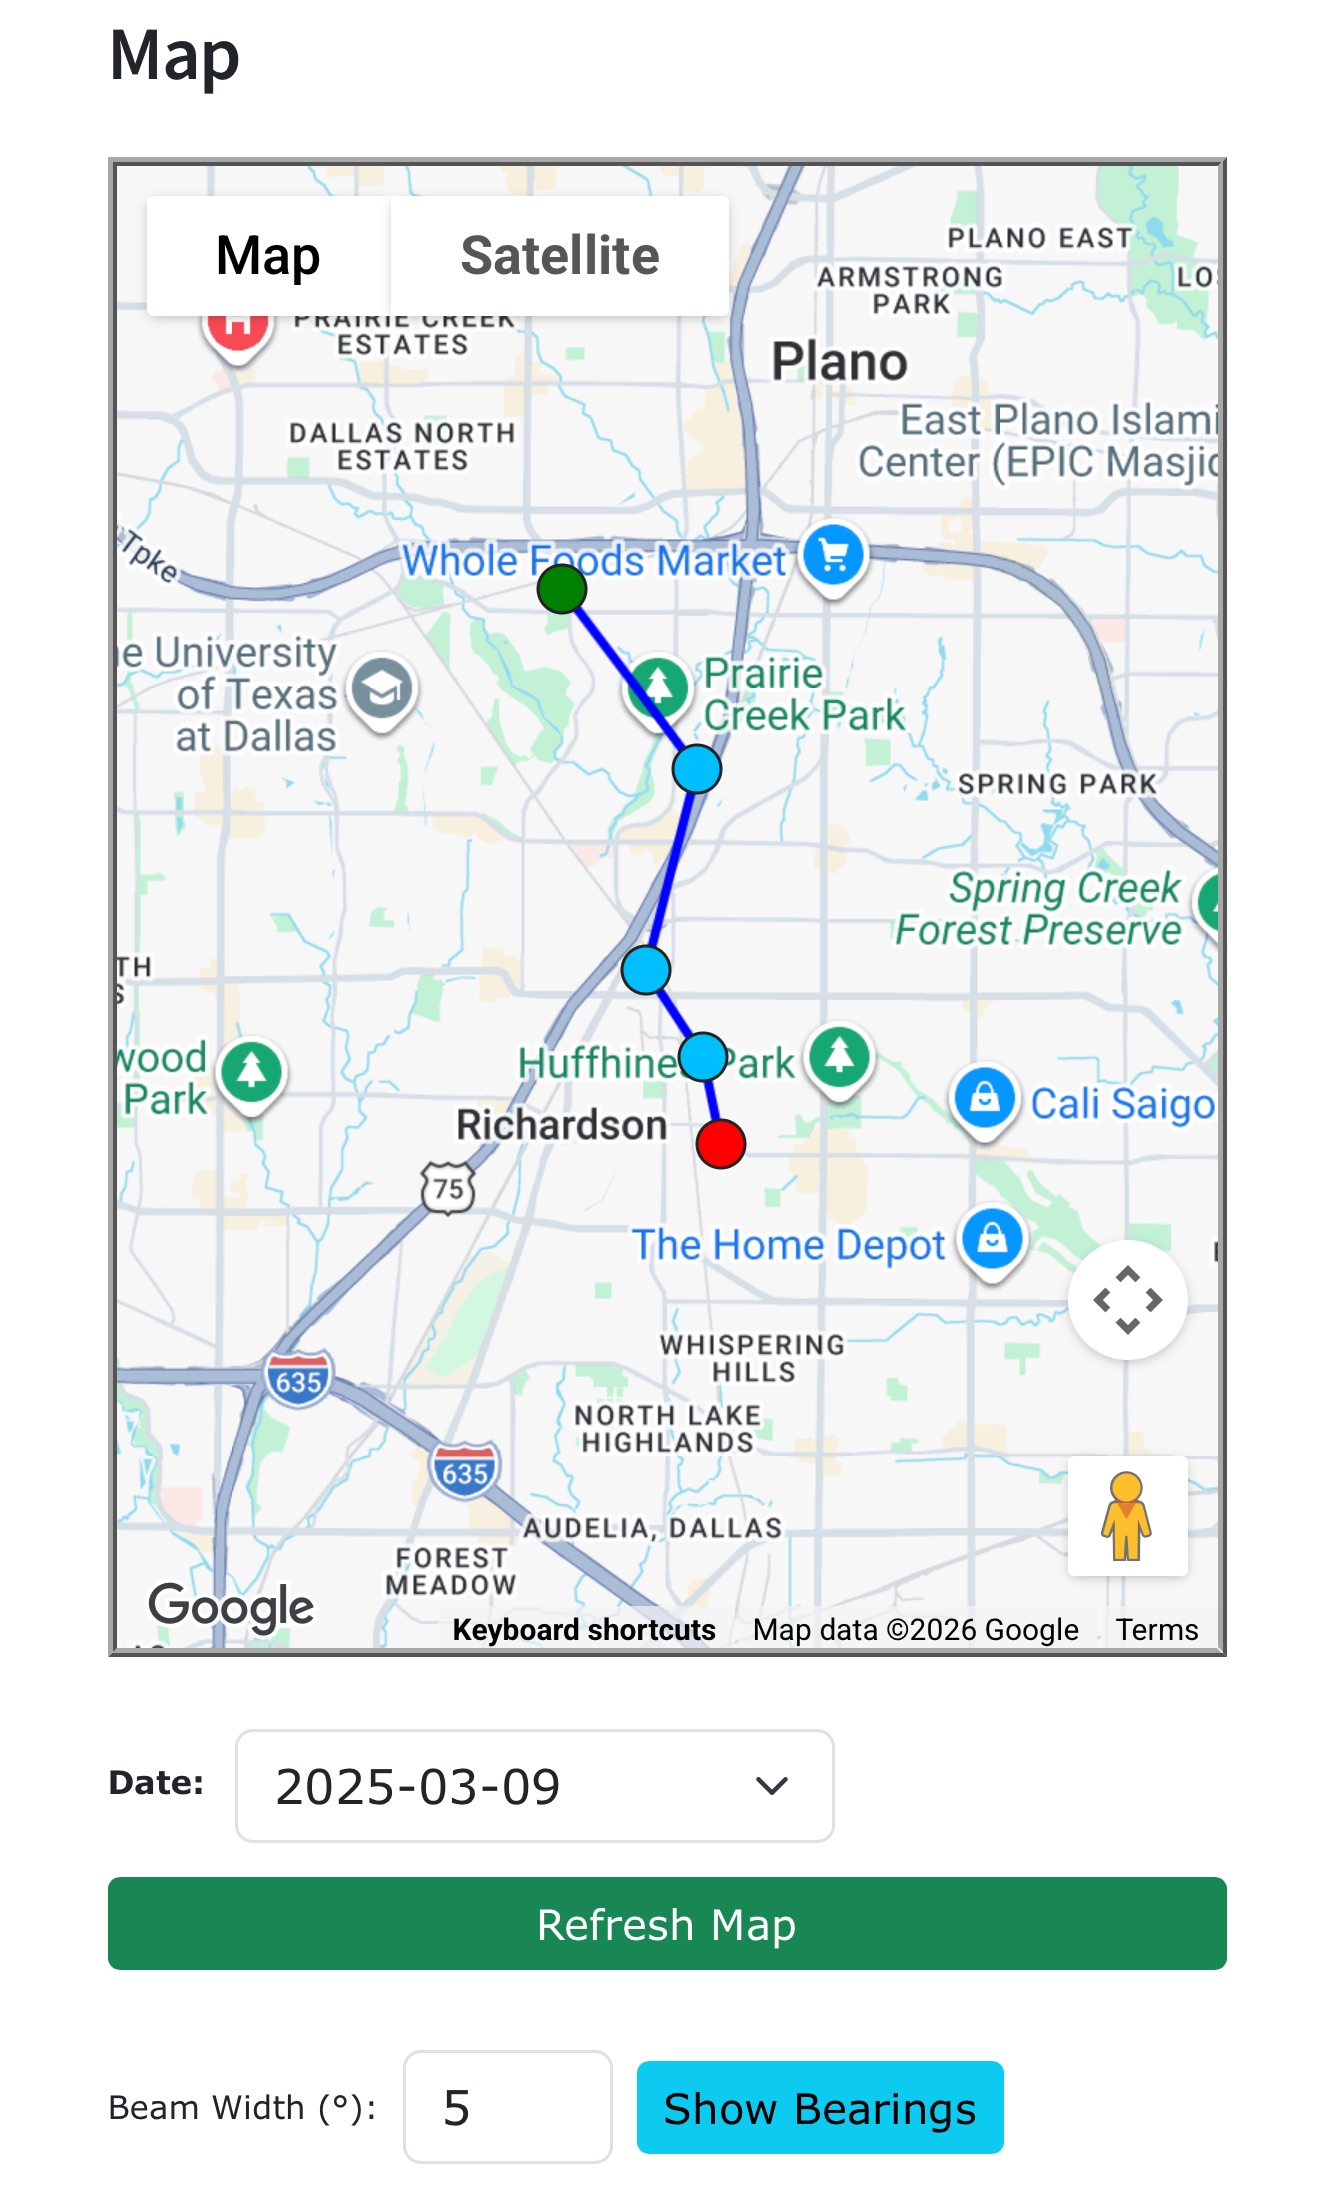
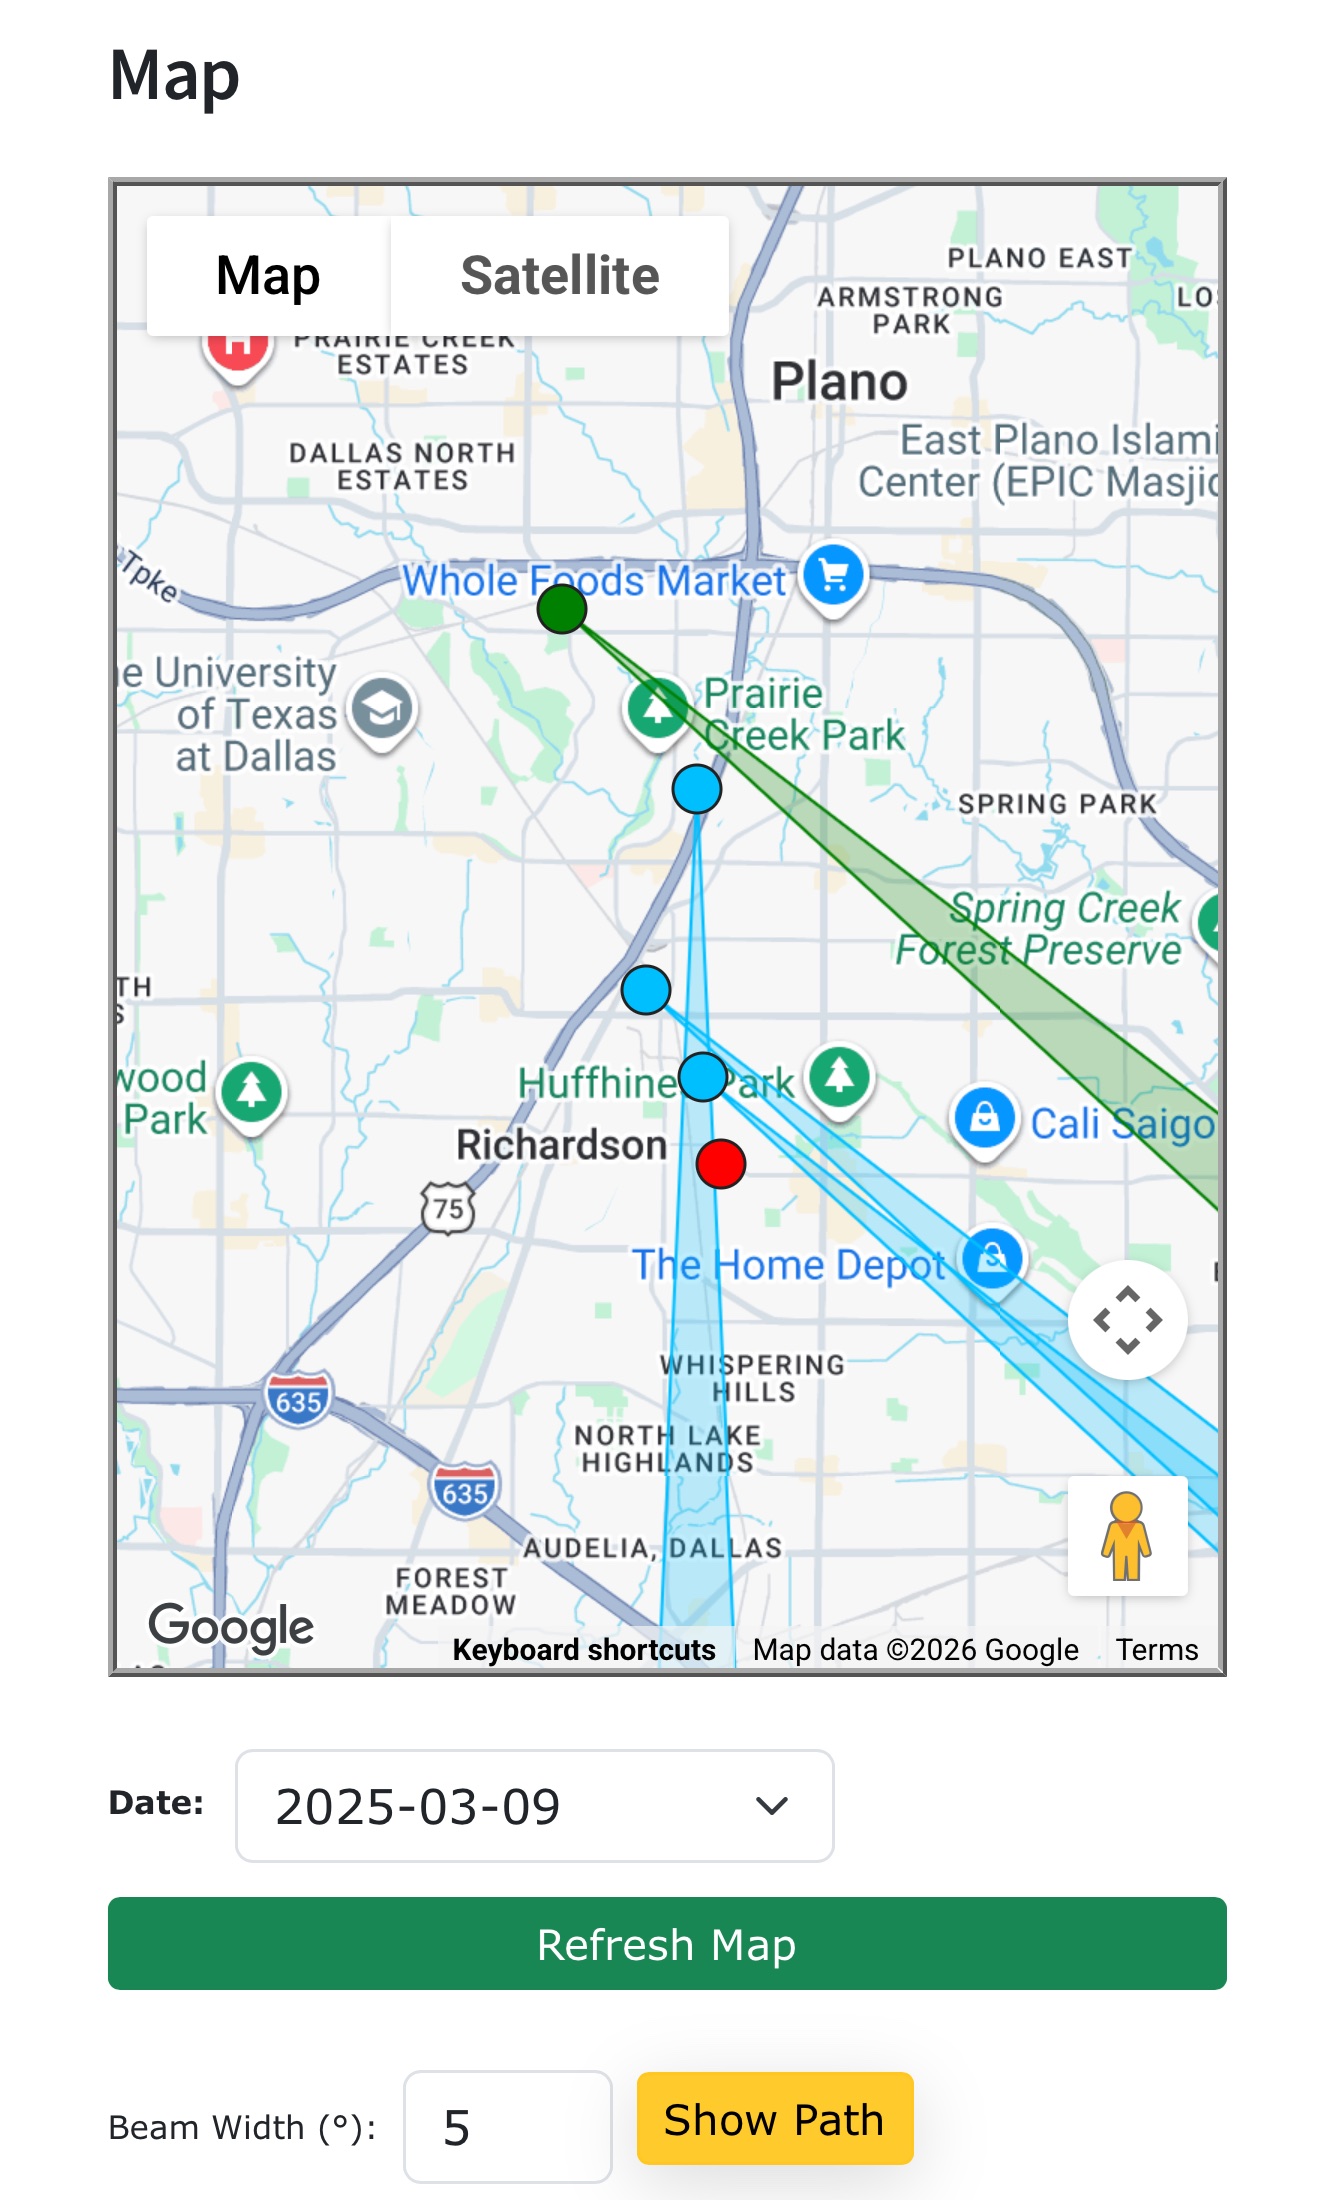
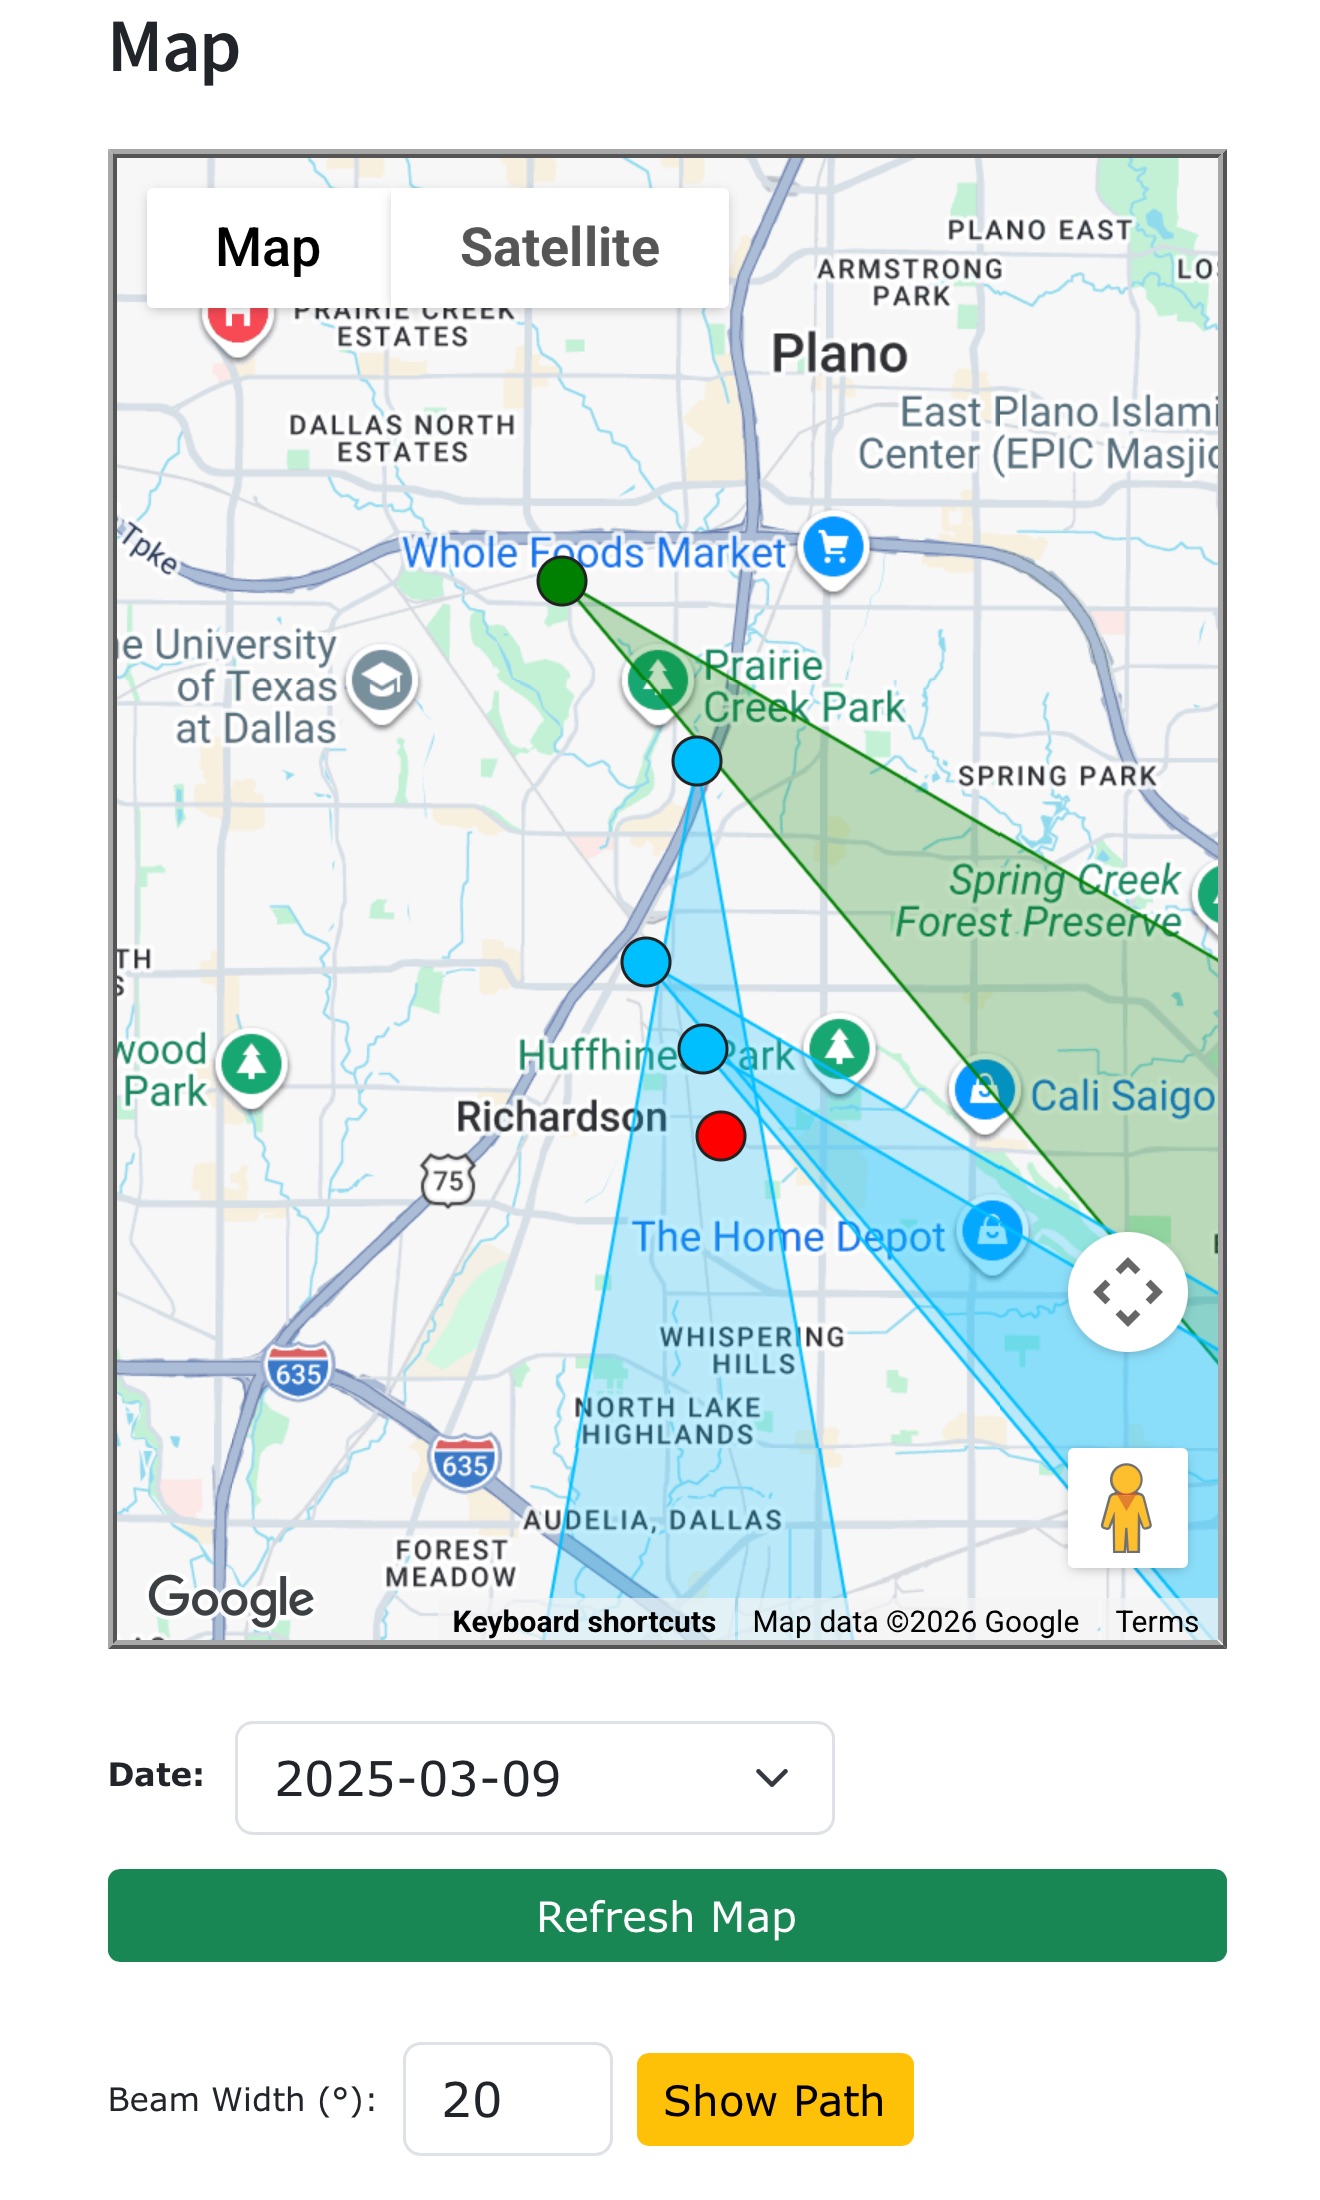
“Hunts” are defined as the set of all locations recorded on a single day for a specific FoxID. The Map at the bottom of the Fox Hunt Logger page provides a view of the locations recorded in the database for the current hunt using Google Maps. Views can be repositioned and zoomed, as with other uses of Google Maps. Each location recorded is illustrated with a “Marker” that indicates the location’s Status/type: Green = Start of Hunt, Blue = Waypoint, Red = Fox Found.
There are two presentations available which may be toggled by pressing the “Show …” button:
- The Path view shows the path of the hunt, starting at the “Start Hunt” and ending at the “Fox Found” location – in the order the locations were logged.
- The Bearing view provides a ray (if Beam Width = 0) or wedge polygon centered on the bearing recorded with the log entry, representing the antenna beam width margin of error.
Marker information
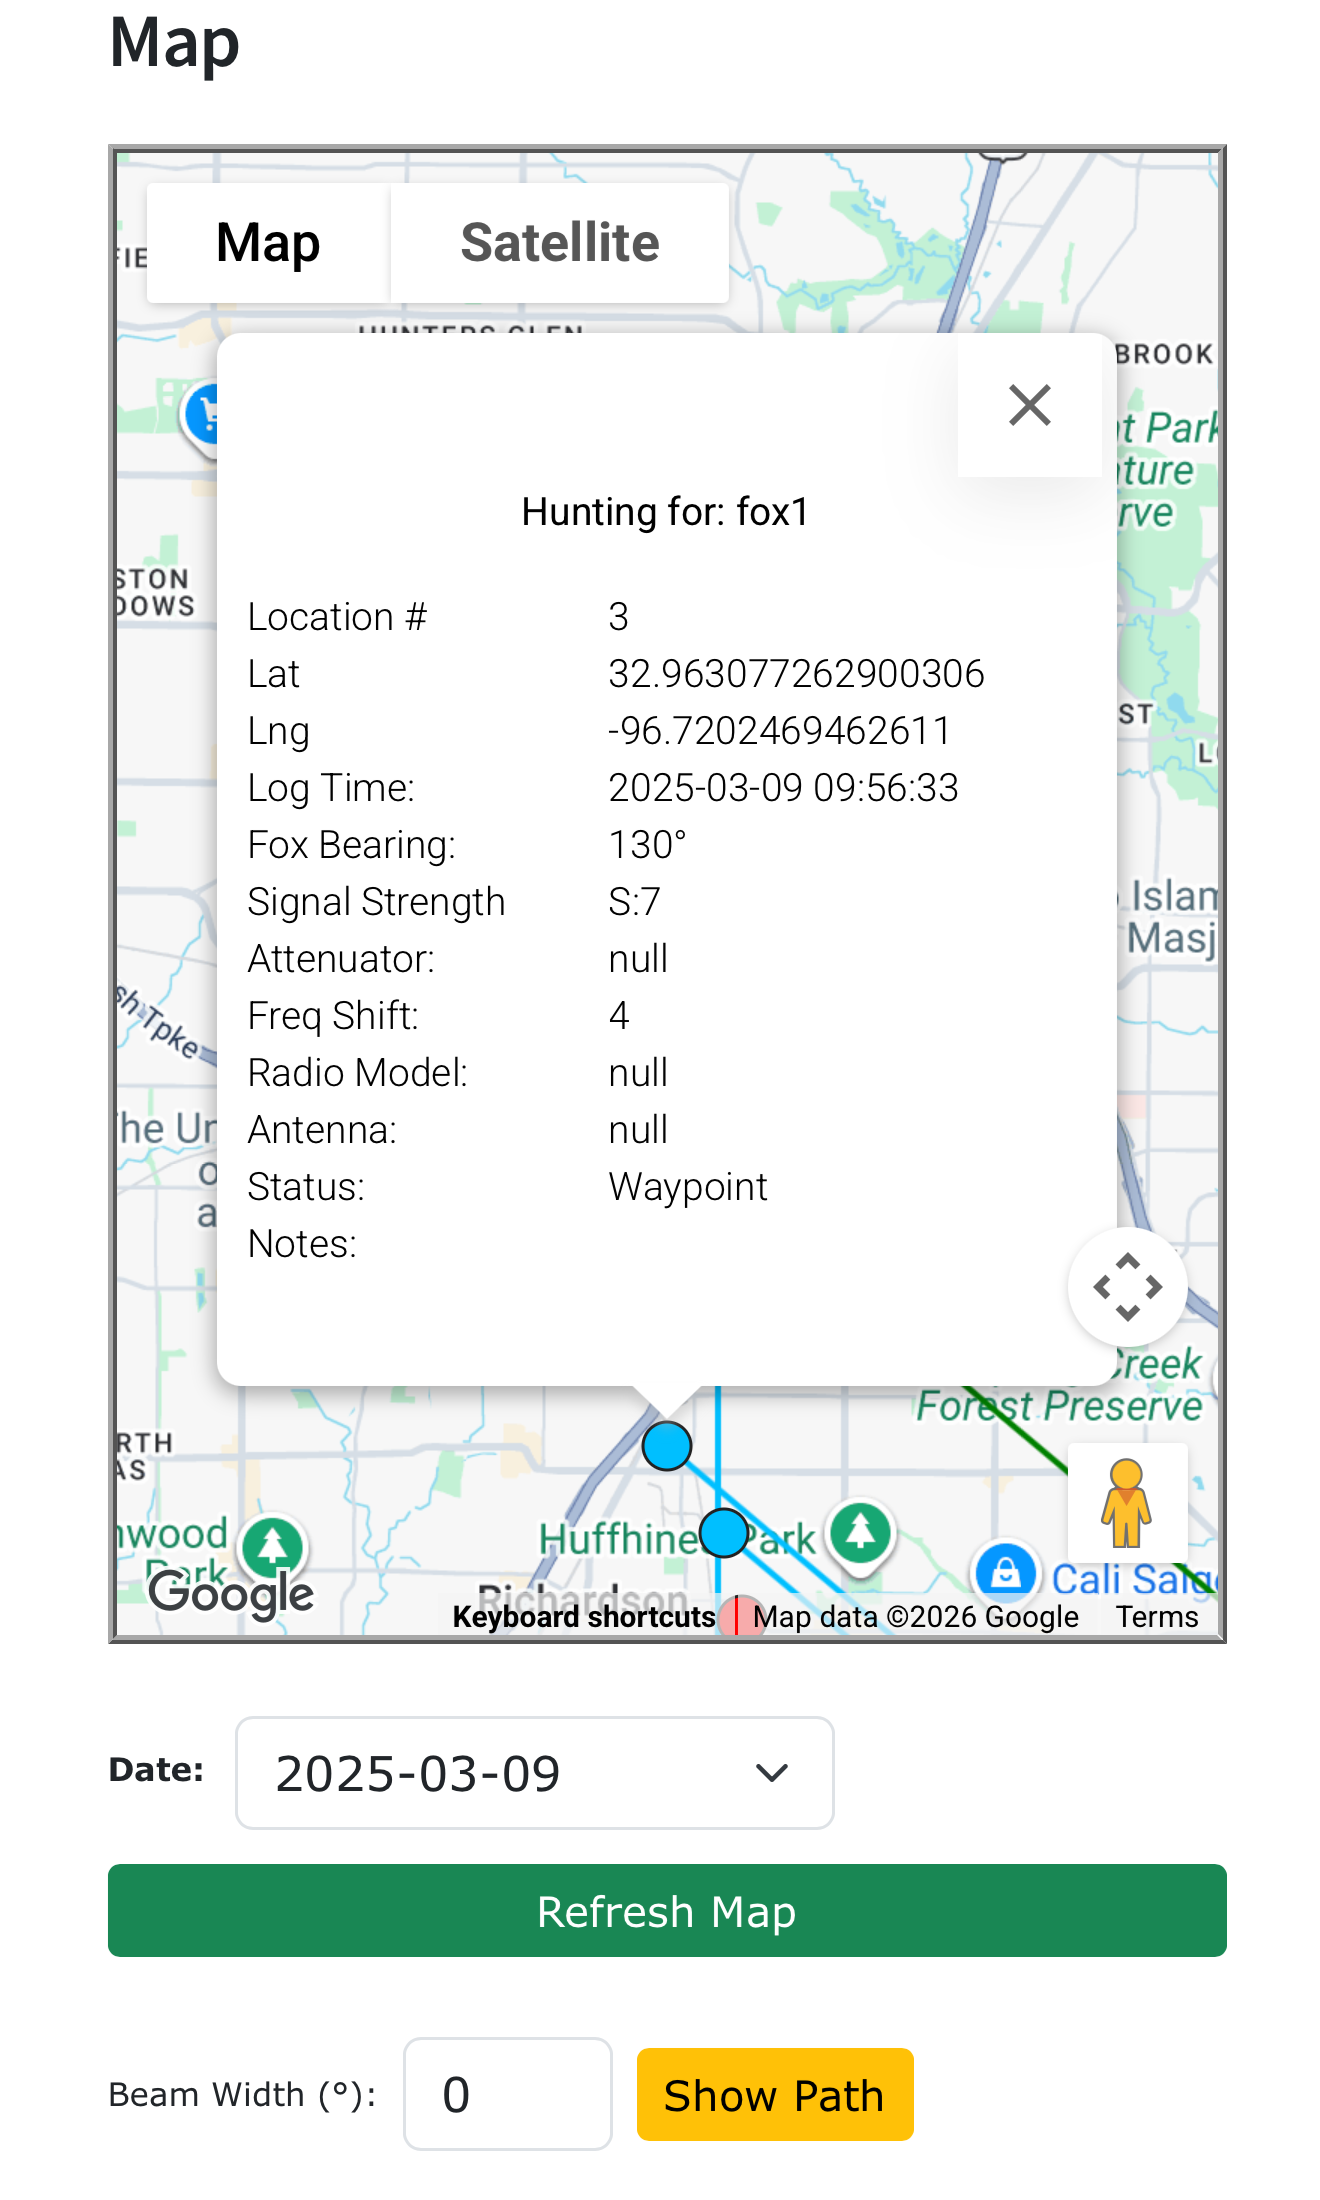
If a Marker is touched/clicked, a pop-up window provides the recorded details for the location record. Click the X in the upper right corner of the pop-up to close the window.
Access previous hunts
Previous hunts may be loaded into the Map (for the current FoxID selected) by selecting the Date in the list below the map, then pressing the <green> Refresh Map button. When a new location is recorded, the Map returns to the current day’s records.
Access the Log
Click on the “Log” at the top right of the Fox Hunt Logger page to access the Fox Hunt Log. This page provides a chronological listing of all Fox Hunts sorted and grouped together by Date/Time and FoxID. Click on the arrow at the left of the row to view all of the entries for the hunt.
The Log will list all records for the logged-in user / Callsign, sorted first by FoxID (ascending order), then by Date/Time (descending). You can refine the listing by setting conditions in the Custom Search Builder section at the top of the table.
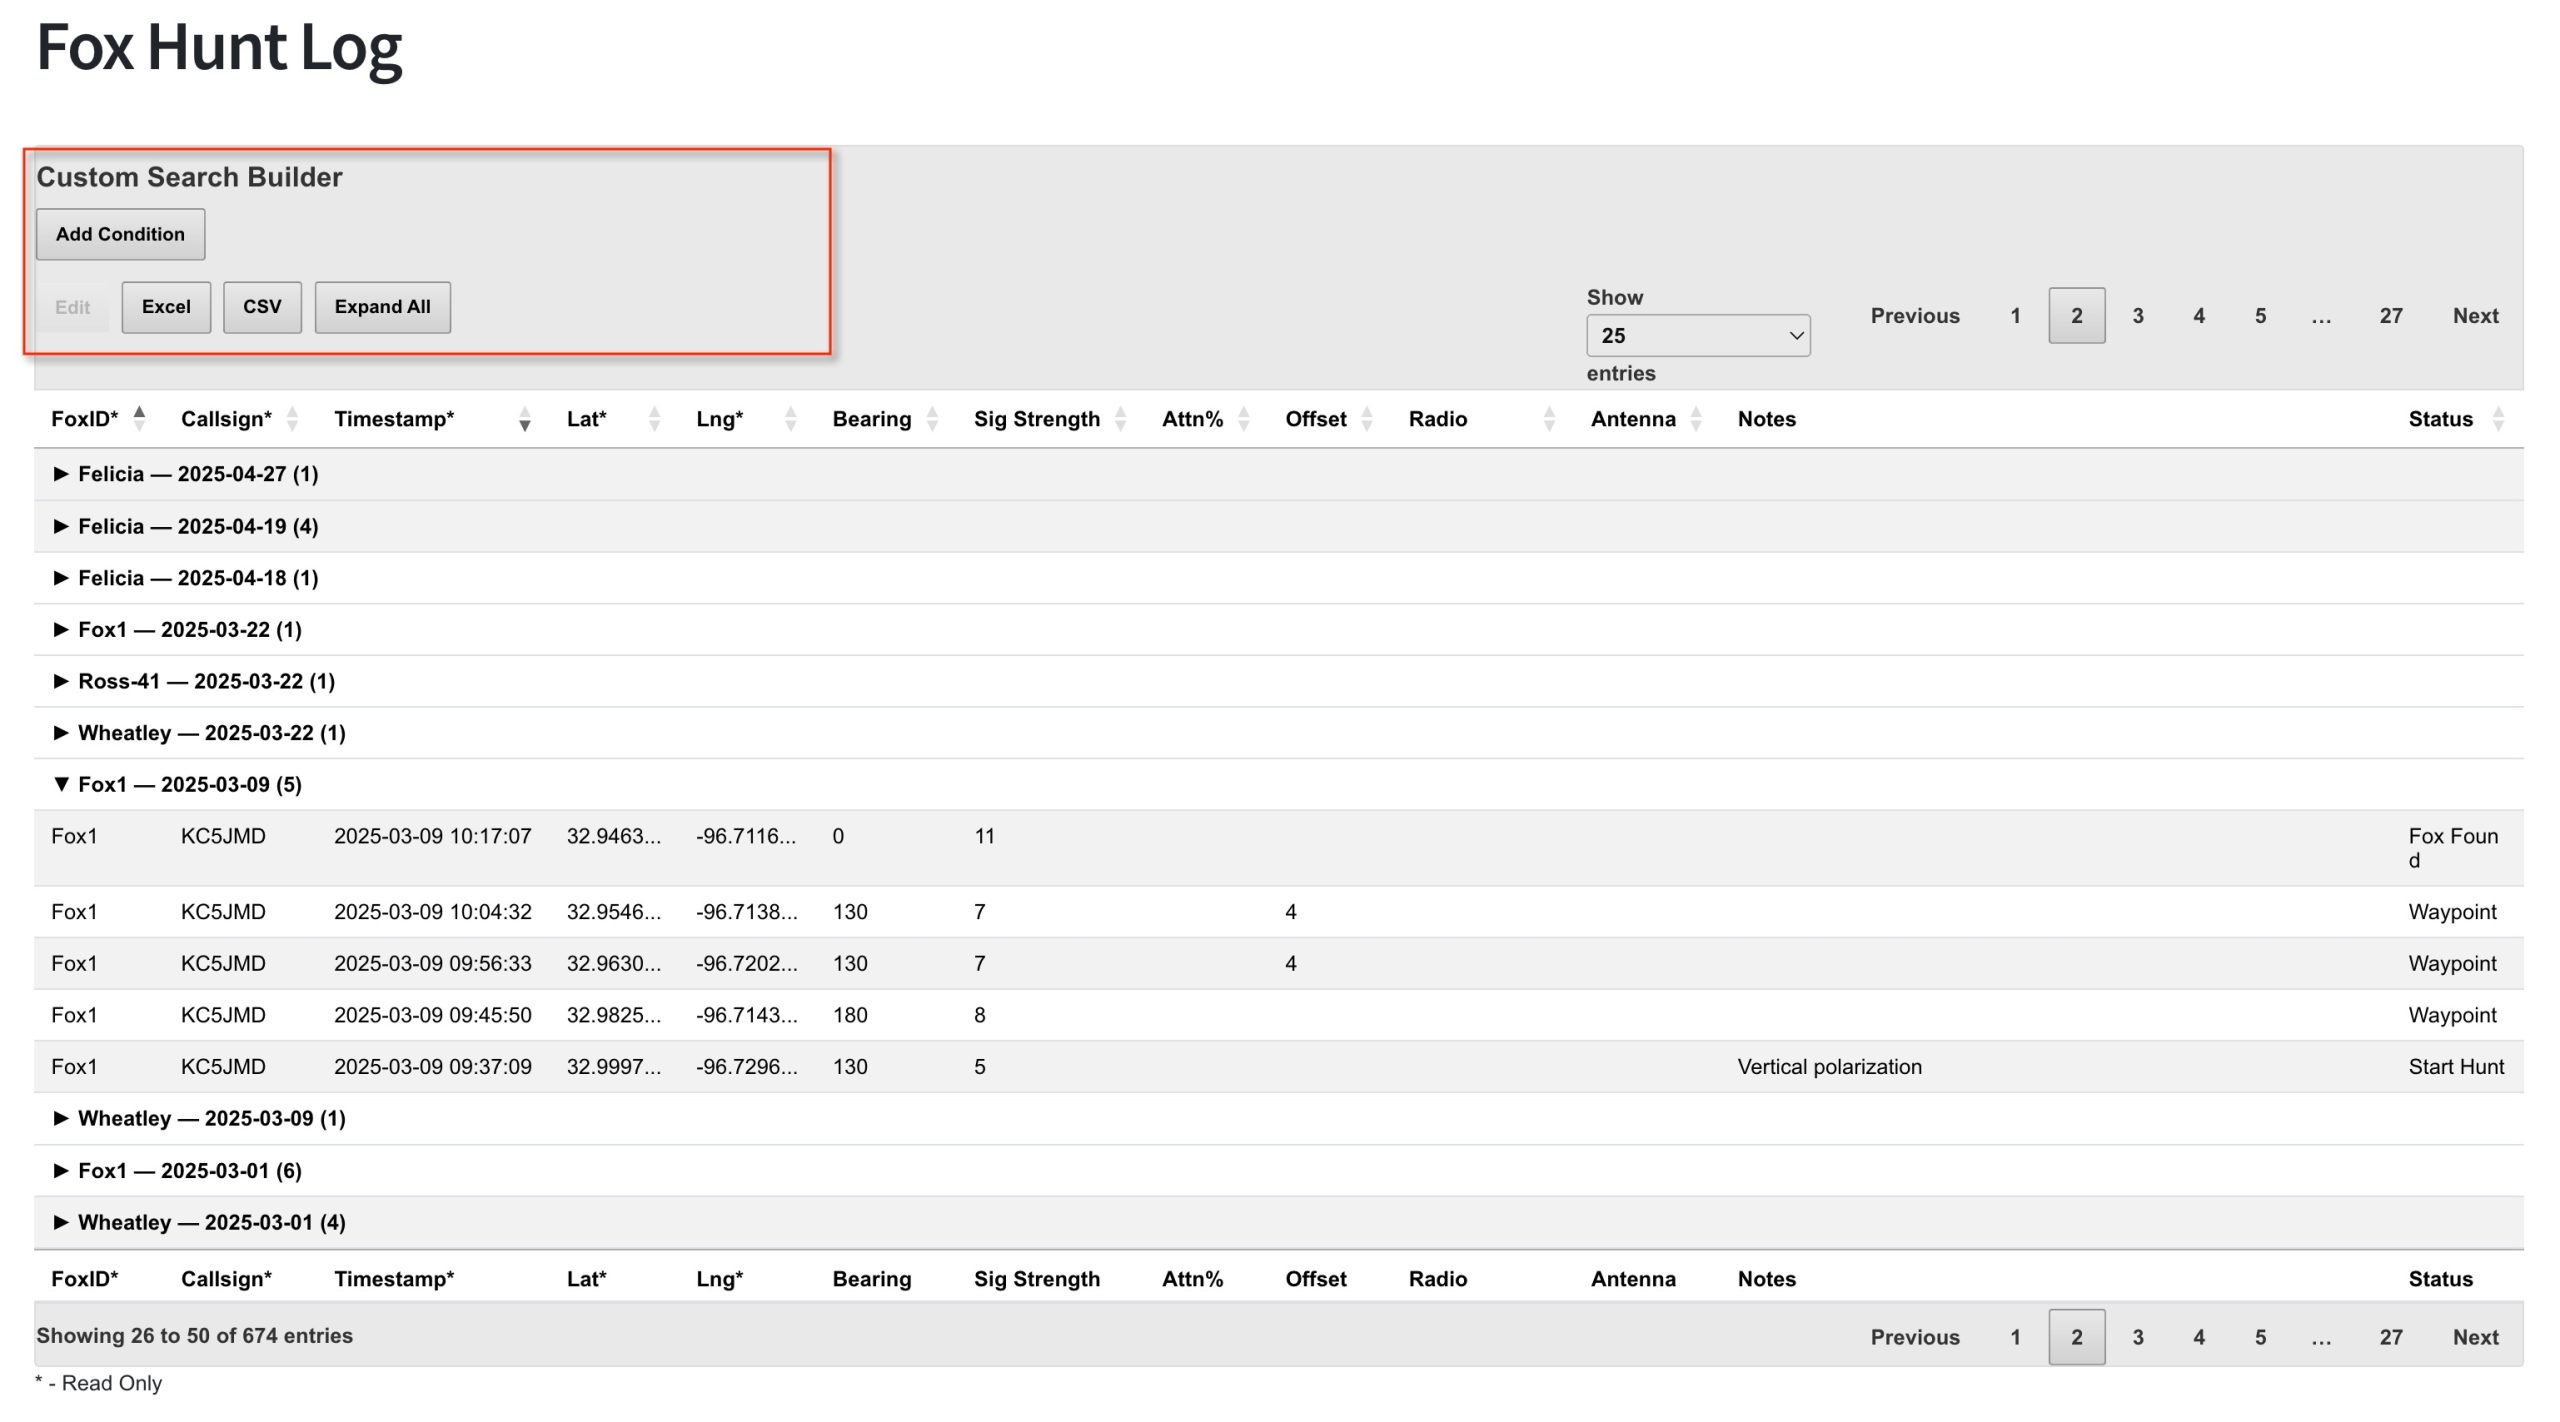
NOTE: The Custom Search Builder is a bit ‘wonky’ (technical term) for dates using the Timestamp column. Best results are achieved by using the “BETWEEN” operator and specifying a Start date before your desired date and an End date after. This is something we’re aware of and on our ‘to-do list’.
Editing a log record
You may change the values you’ve entered, including Bearing, Sig Strength, Attn%, Offset, Notes, and Status – using the Edit feature on the Log table, in 2 ways:
- Click on the field you want to change. The field will change color and the content can be updated. Simply hit <Return> to save the chance.
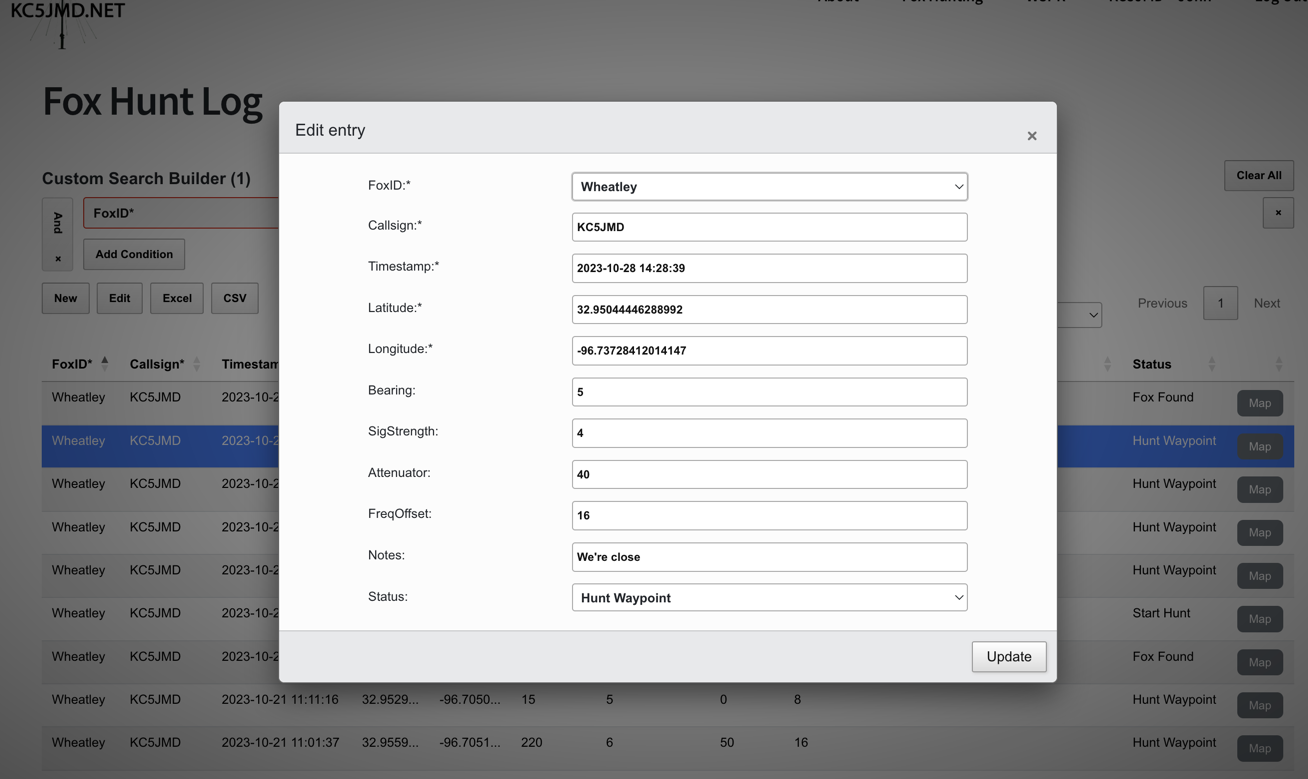
- Click on the FoxID (far left) column to highlight the entire row. The “Edit” button above the table will be enabled and if you press it, a pop-up window will be opened containing the field values. Again, select the field to change and update the value. Press the “Update” button to save the change.
- NOTE: The FoxID value may be changed – but only in the pop-up Edit window. The Callsign, Timestamp, and Lat/Lng fields may not be edited.
Changes are saved immediately and may not be ‘rolled-back’, so be sure before you make an edit.
Exporting records
All of the data listed may be exported in either Excel (.xlsx) or Comma Separated Values (.csv) file formats. The export function will include all records that are included in the displayed table. Rows on additional pages will not be included – so to export ALL records for your query, set the page length selection to “Show ALL entries“. Of course, you can use the Custom Search Builder to select only the records you are interested in. When ready, press the “Excel” or “CSV” button at the top of the table and the file will be sent to your browser’s Download directory.
NOTE: While the Lat/Lng coordinates are truncated to 4 decimal places on the displayed table, the exported data includes the full resolution received from the GPS device.